Have you ever tried crocheting a shape that’s more space than stitches? Well, that’s what I set out to do here as I explore these negative-spaced gaps. While I usually focus on how yarn crafts intersect with other topics such as mathematics and programming, it’s just as helpful to understand how stitch structures behave on their own. If you’re someone who enjoys experimenting with stitch structure, shape, and size, then working with negative, cutout shapes could open up a whole new creative landscape.
∘ The inspiration behind the heart
∘ The design process
∘ So, what is a picot anyway?
∘ Trials and errors
∘ Where it went wrong
∘ Taking a better approach
∘ The finished product
∘ Lessons learned and future projects
The inspiration behind the heart
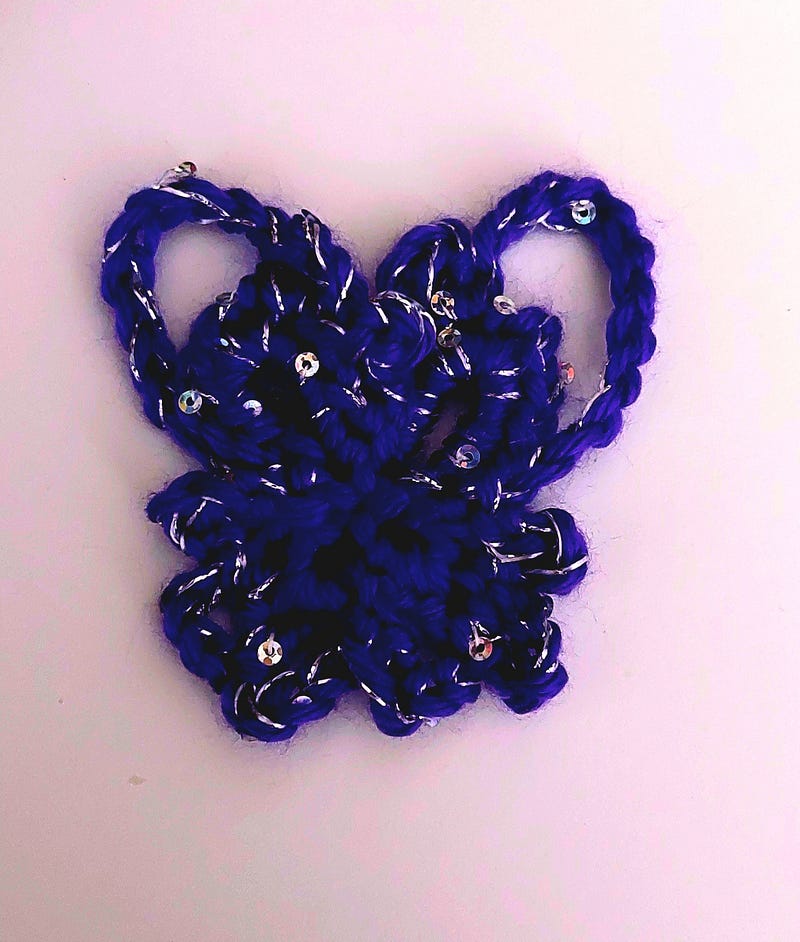
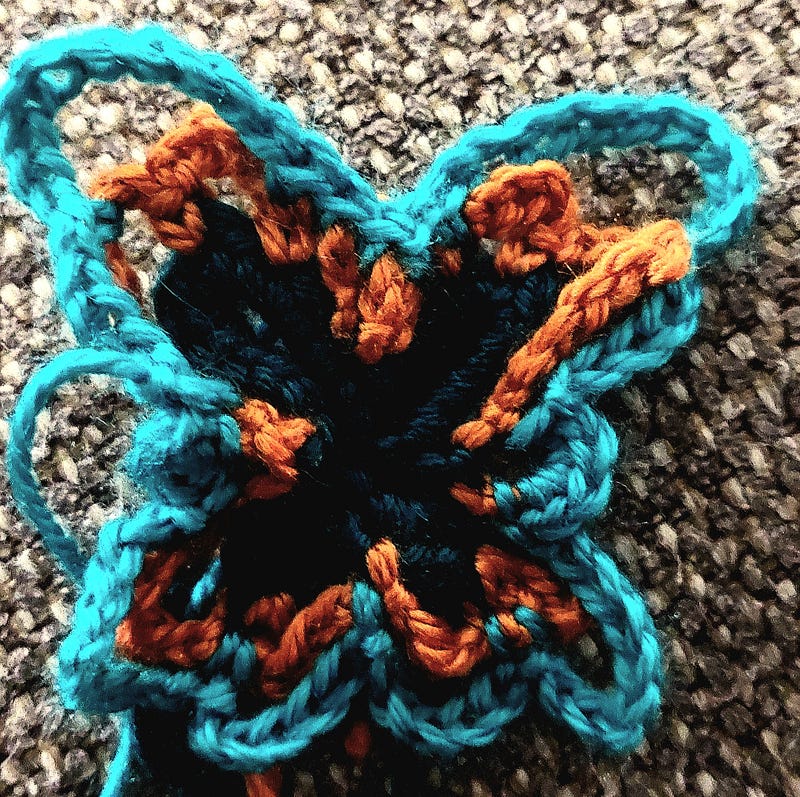
Around the time I started writing this post earlier this year, Valentine’s Day was looming just around the corner. So, I thought it would be fitting to try creating negative-spaced heart shapes. The heart shape is just one of many I’ve considered exploring, and now, I thought it would be a good time to try creating them in all their negative-spaced glory. Anything from butterflies to rectangles, each shape offered a chance to explore what yarn can do.

My primary objective for this project was to design cutout silhouettes that are structurally stable and maintain their form without requiring frequent adjustments. Well, I assumed that crocheting a series of openwork hearts would be quite challenging. However, after closely examining stitch dynamics, the process became much clearer.
I searched Google, Pinterest, TikTok, and other social media platforms to understand how the shape gets created. Surprisingly, I found very few results that matched what I was envisioning. Many of the results that returned for me were the large crochet cutouts commonly seen in sweaters, blouses, or showing as entirely different design schemes altogether. However, the more prominent options are just as stunning!
It became clear that this specific heart cutout shape isn’t too prevalent in crochet, making it difficult to find a lot of direct references. However, in my search, I came across a couple of designs with structural similarities.
I happened upon Wander and Create with Emma, whose beautiful pattern reinforced the idea that a series of cutout hearts embedded in fabric was possible. Even though I developed my own design, their approach provided valuable insight into the structure. ABCuteCreations also demonstrated a similar concept in a 2019 video, which helped me better understand possible the stitch arrangements. I experimented with my own method, but their work provided a helpful reference point.
Ultimately, this heart cutout design was developed entirely through my own trial and error. I tested various stitch placements and anchoring techniques until I arrived at a method that worked for me in my design. Hopefully for whoever reads this, it works for you too!
The design process
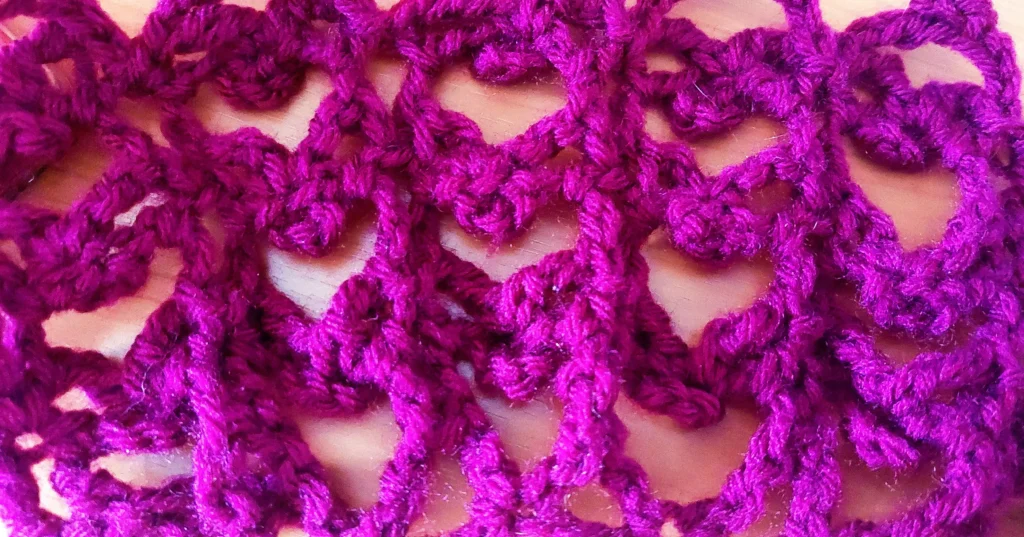
This shape is quite simple to do. It involves a combination of treble stitches (or double crochet stitches for smaller hearts), chain stitches, and a picot stitch in the top center of an existing heart. All the stitches that make up the heart will join at a center point at the bottom (in an existing stitch). If you are familiar with the v-stitch pattern, that is major because the heart shape is simply that but with an additional step. Much like the tulip stitch, these hearts are an extended form of the v-stitch. This time with a picot thrown in midway.
So, what is a picot anyway?
A picot is a small loop created by chaining a certain number of stitches and then connecting them back to the main work or starting point. For additional information, there are many helpful resources available that further discuss how they work.
Trials and errors
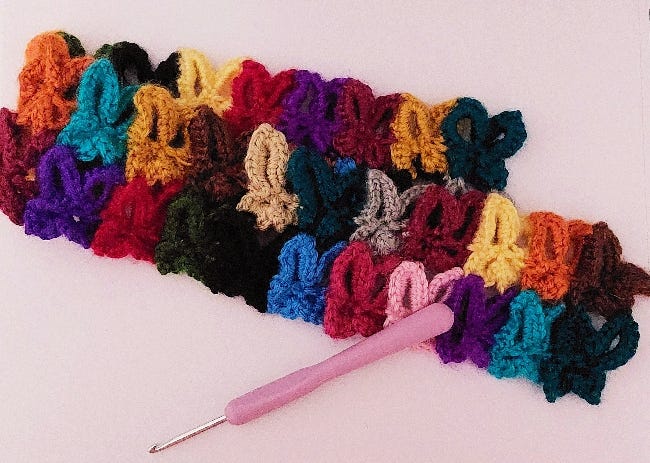
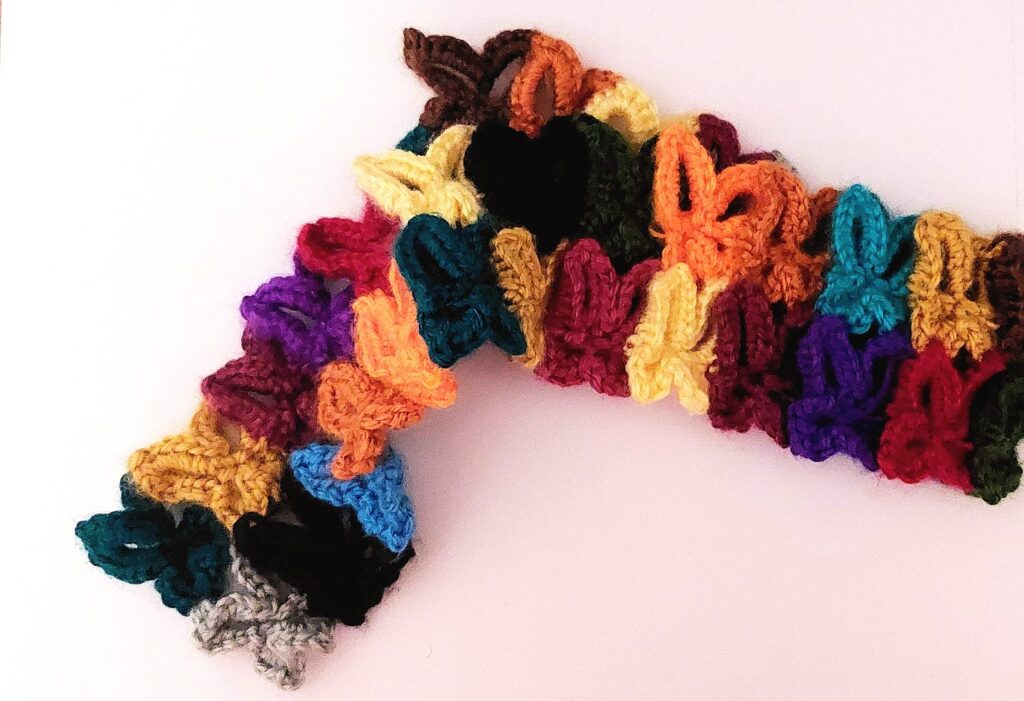
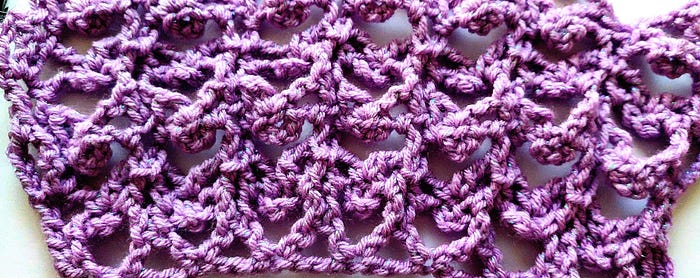
A few challenges I encountered in making this pattern mostly centered around keeping the edges even, getting the right proportions, and maintaining structural integrity. There is a thin line between what was intended to be hearts and what became something else resembling a wobbly circle, a pair of lips of the human mouth, or some birds in flight. Take your pick.
Original design:
In my original design, a short picot chain and overly long side chains threw off the heart’s balance and shape. After creating the first treble crochet in any given chain, I followed this (wrong) sequence:
- Made 1 treble crochet (tr) into the next stitch. This forms the right base of the heart.
- If anchoring into an existing heart shape, place 1 half double crochet (hdc) into the right side (lobe) of the previous heart created one row below. This helps stabilize the shape.
- Chain 4. This creates the right arch of the heart. (Note: This amount may be adjusted to prevent looseness depending on your yarn and tension.)
- Create a picot: Chain 5, then place 1 single crochet (sc) into the 2nd chain from the hook. (This shorter picot creates a subtle point at the top of the heart.)
- Chain 3 more, then place 1 sc into the 2nd chain, and chain 3 again. (Be cautious: excessive chaining can stretch the heart shape.)
- Make another treble crochet (tr) into the same stitch as the first treble. This completes the left side of the heart.
- Anchored the left side of the heart with 1 hdc into the left lobe of the previous heart wherever available.
Sometimes, the heart puckered inward, puffed outward, or protruded from the back, creating an unexpected relief effect. This behavior is one of the “joys” of working with different yarn fibers… each one behaves uniquely based on its weight and composition.
Yes, as you probably realized, the design can go sideways quickly.
Where it went wrong
It was primarily a few issues at play against the design:
- An inconsistent number of stitches: At some point in that first attempt to design the stitch, I kept alternating between chaining three chains before the picot and chaining four after it.
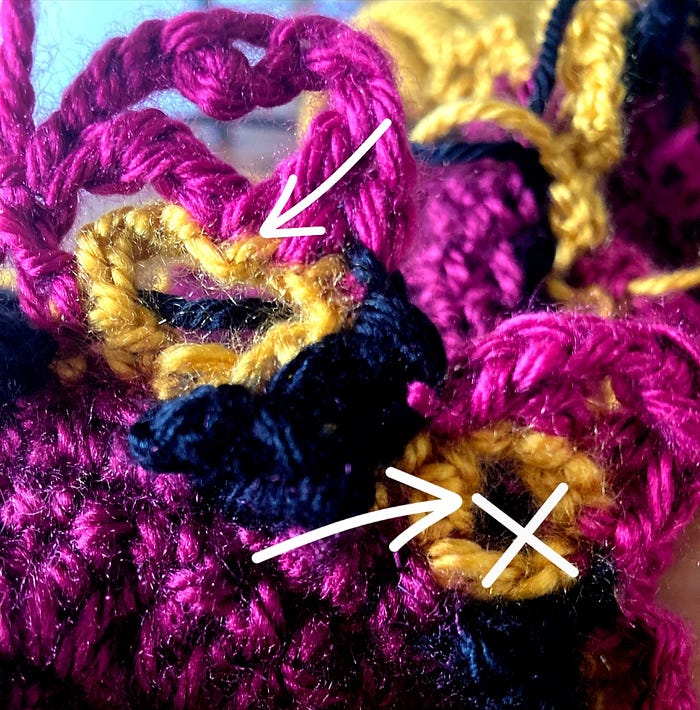
- Improper or Missing Anchoring: another issue with the original design arose from the absence of a method I call anchoring. What is anchoring? Anchoring is a way of molding the shape by ensuring that it holds its intended form with the help of stitches. I completed the step by placing stitches at different points along the shape. These stitches act as support points that guide and reinforce the structure, preventing distortion or collapse. Anchoring is similar to how support beams, columns, or pillars hold up parts of buildings.
- Wrong stitch placement at the top: This one might be a bit of a nitpick on my part since you can place the heart in any available top stitch. Still, I noticed that positioning it in the most open space at the top affected how the shape looked.
Here’s what those earlier missteps revealed about the process, and more importantly, how we can improve upon them.
Taking a better approach
I now realize that open work heart shapes are some of the most fickle shapes to work with, but with the right approach, there is an effective way to create them.
What I did differently to improve
- A more mindful stitch placement: to improve the design, I changed my approach by paying closer attention to where each stitch landed. I realized that even a slight shift in where I anchored a treble or chain could throw off the shape. By being more deliberate with my stitch placement, I was able to create a cleaner, more recognizable heart silhouette that held its shape better and looked more intentional.
- Better stitch offsetting: instead of allowing each heart to stand on its own with a stitch off to the side in the next stitch, it is easier to anchor them using half-double crochet stitches. I placed one half-double crochet stitch on the right side and another on the left side. This change in the design provided better balance and structure.
- Better anchoring at the top: When determining the optimal space, hole, or stitch to place the crochet heart in at the top of an existing heart, we can consider both the aesthetic flow and the structural balance of the design. I found that placing the new heart into an existing single crochet at the top helped ground it better.
The final pattern
- place 1 half double crochet (hdc) into the right side (lobe) of the next available heart
- Make 1 treble crochet (tr) into a single crochet (sc) st at the top
- In the same stitch as the previous treble crochet, chain 7
- Skip 4 chains from the hook, and make 1 single crochet (sc) into the 5th chain
- Make another treble crochet into the same stitch as double crochet and chain-7 picot just made, ch 2
- Make 1 half double crochet (hdc) into the left side to form the left lobe of the heart
There you have it!
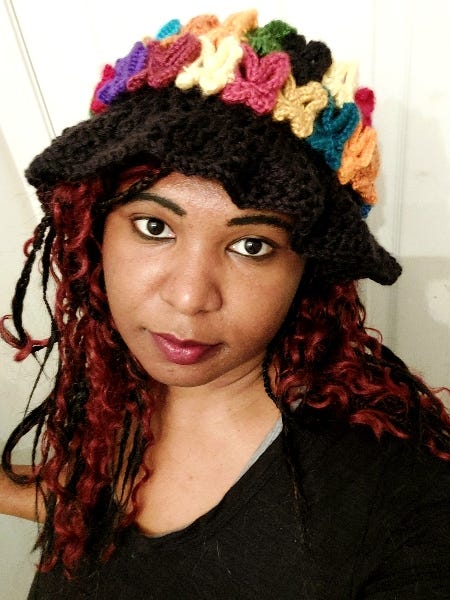
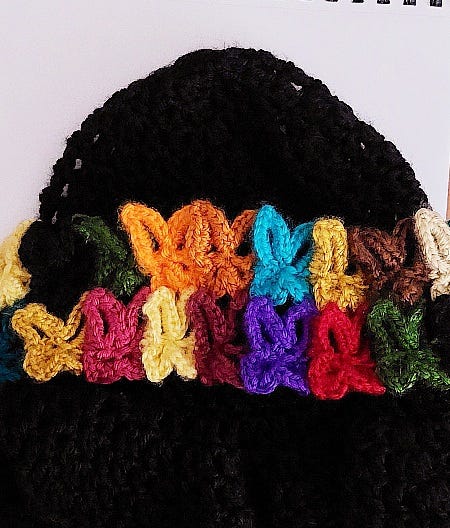
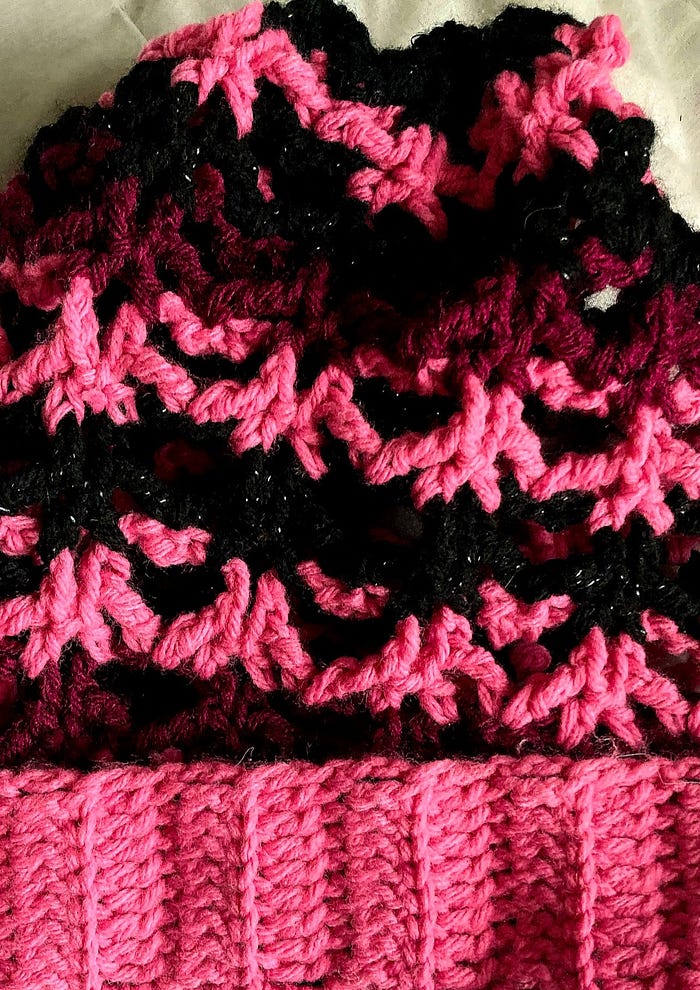
The finished product
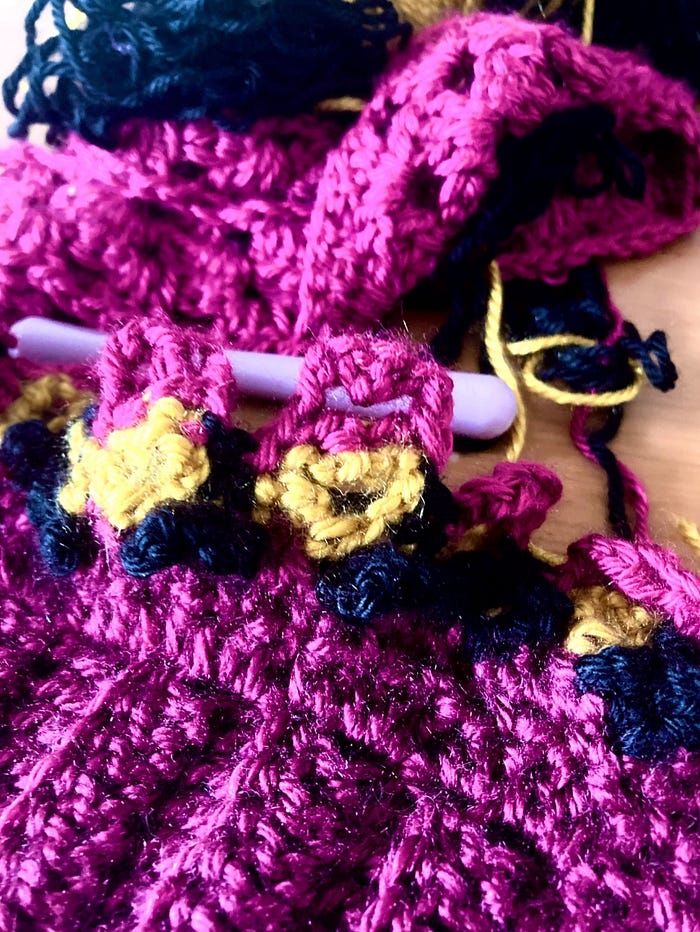
It’s one thing to create a test swatch of heart cutouts, but to make a hat filled with them is another animal entirely.
The final product was — at the very least — presentable, but there was still room for improvement. Most importantly, what is intended to be a heart looked like one.
Lessons learned and future projects
Like most crochet projects, getting from idea to execution took more patience and tweaking than I expected. This is true for all endeavors to take off, and it’s especially true for crochet projects. The type of stitches used can really make or break the shape of our heart, or any other cutout shape, for that matter.
Tying it all together
Ultimately, this project reinforced how much stitch choice, yarn type, and tension will affect the final shape. The real challenge is getting the completed shape to maintain its form, but we can always find ways to circumvent yarn’s tendency to have a mind of its own through blocking!
Nevertheless, once this stitch is mastered, it can be included in any pattern or design. I’m excited to keep refining my technique, and I hope this post encouraged you to experiment with cutout shapes too!
If you’ve tried a similar technique or have tips for shaping negative-space designs, I’d love to hear your thoughts. Feel free to drop a comment, tag or share your experiences with this — successes and flops alike.
Thank you for reading.